NodeJS is one of the most used Javascript backends in the market right now due to its ease of use and accessibility. In this Redis NodeJS tutorial, we will see how we can set up and use Redis with NodeJS. So, let us get started.
What is redis and why do you need it?
Redis is a popular data storage solution that works as a database, message broker, and cache. Due to its capability of storing the information inside the memory, Redis is extremely fast and secure. Redis is a great option to reduce the response time of the server as it eases the load on your SQL or NOSQL databases. Let us see a simple example of an endpoint that has caching enabled.
Using Redis with nodejs
First of all, make sure you have nodejs and redis installed on your local machine. After successfully installing both, navigate to the directory for the backend and enter the following command.
npm initThe next step from here is to install the dependencies that will be used for creating our sample project with Redis.
npm install axios express redis nodemonCreate a file named server.js and enter the following code inside it.
const express = require("express");
const axios = require("axios");
const redis = require("redis");
const app = express();

app.listen(process.env.PORT || 3000, () => {
   console.log("Node server started");
});
In this bit of code, we have exported the right packages and initialized a basic nodejs server on port 3000. Now is the time to create a new API endpoint with the support of Redis cache. In this project, we will have an external API that will fetch data for us and return it as a response. You are free to experiment with a database of your choice as well. We will be using JSON placeholder API. To create the endpoint, add the following code inside server.js
app.get('/:searchtext', async(req, res) => {
   const searchtext = req.params.searchtext;
    const recipe = await axios.get(`https://jsonplaceholder.typicode.com/${searchtext}`);
     return res.status(200).send({
           error: false,
           message: `Data for ${searchtext} from the server`,
           data: recipe.data
         });
   })
Now run the server with the following command.
nodemon server.jsLet us make a request to this endpoint. We will be using postman on our end to make the request. The response looks as follows.
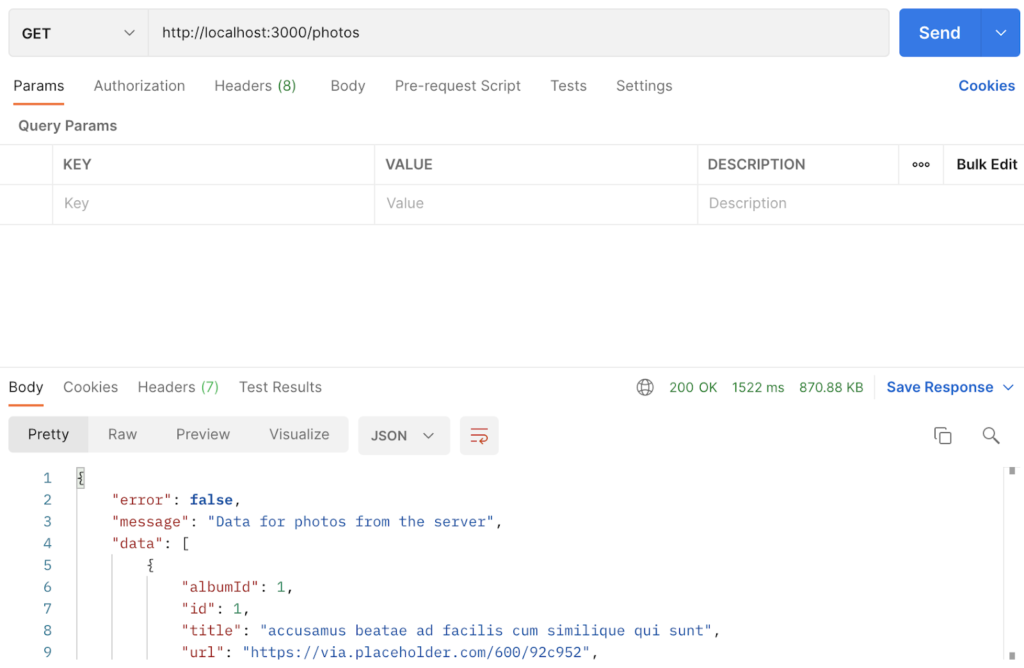
The endpoint will always return the same data on each request and it will take the same amount of time. There is where Redis comes into action; let us add Redis to the endpoint and see the significant difference in the time and speed of the response.
const port = 4000;
const client = redis.createClient(6379);
client.on("error", (error) => {
console.error(error);
});
app.get('/:searchtext', (req, res) => {
try {
  const searchtext = req.params.searchtext;
  client.get(searchtext, async (err, data) => {
    if (data) {
       return res.status(200).send({
        error: false,
        message: `Data for ${searchtext} from the cache`,
        data: JSON.parse(data)
      })
    } else {
        const recipe = await axios.get(`https://jsonplaceholder.typicode.com/${searchtext}`);
        client.setex(searchtext, 1020, JSON.stringify(recipe.data));
        return res.status(200).send({
          error: false,
          message: `Data for ${searchtext} from the server`,
          data: recipe.data
        });
    }
  })
} catch (error) {
    console.log(error)
}
});
app.listen(port, () => {
console.log(`Server running on port ${port}`);
});
Let us explain what is happening in the above piece of code. Firstly, we have initialized the Redis client on the port of choice. Inside the endpoint, we make Redis cache the data against a specific key and return the response if the appropriate cached data is available without hitting our external API. In case of cache not being there, the server will hit the external API and cache it for subsequent requests.
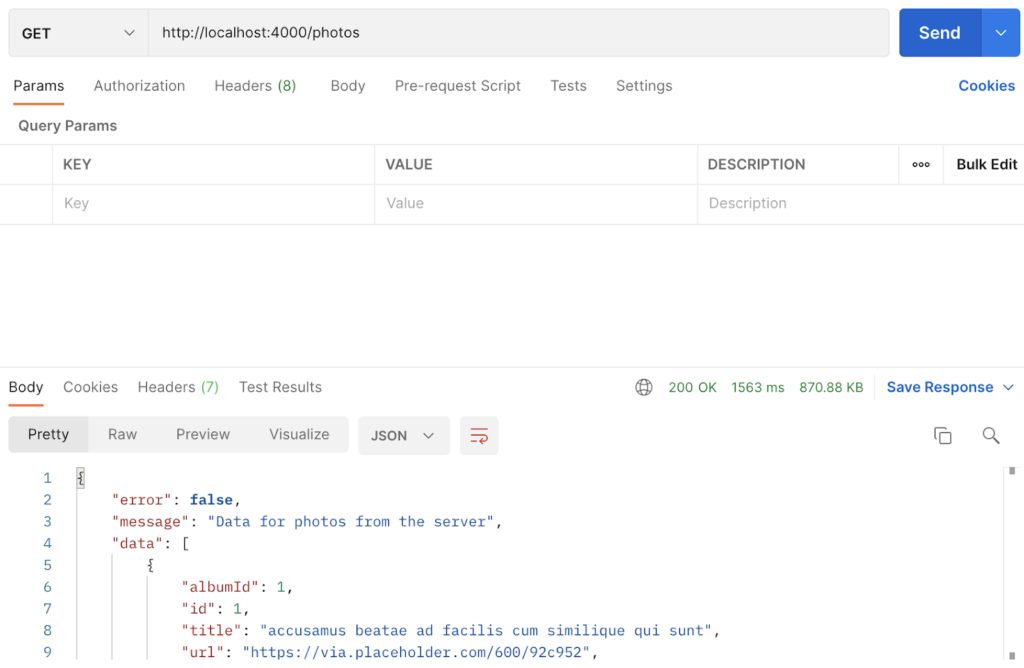
client.setex() is the function that takes a key, its value, and duration for the validity of cache as an input. In our case, searchtext is the key and the data from JSON placeholder API is its value. Let us run this code and see the response on the postman to see the results.
The final Result
The first request made to the endpoint.
Next request.
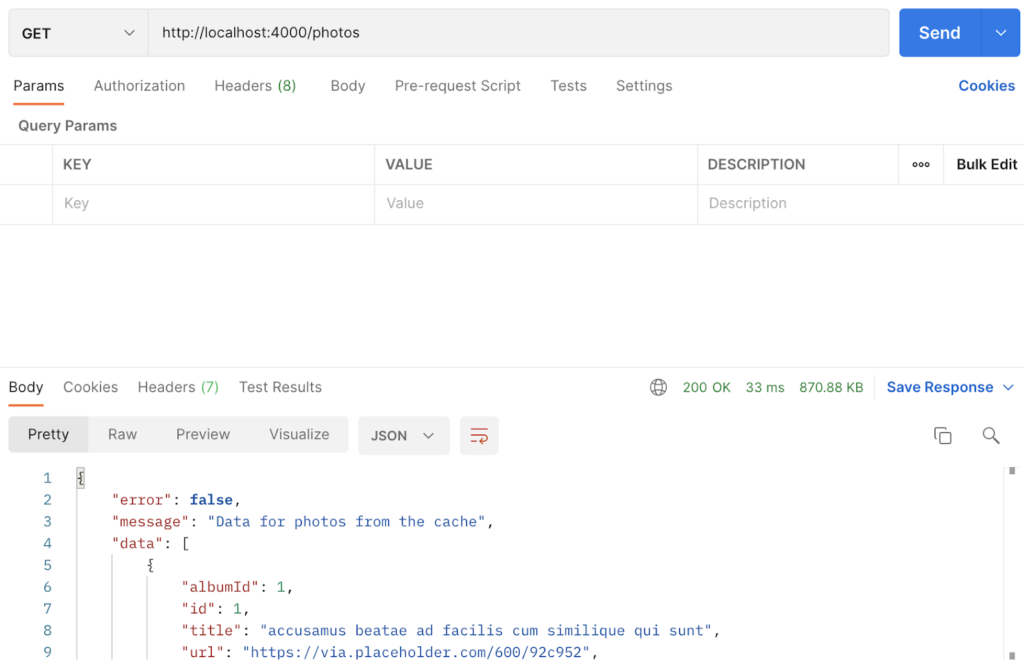
We can see that the time taken for the response is reduced from 1563ms to 33ms which is a huge change.
Conclusion
In this article, we have shown how you can use Redis with nodejs with a basic implementation. There is so much that you can learn about on their official documentation.