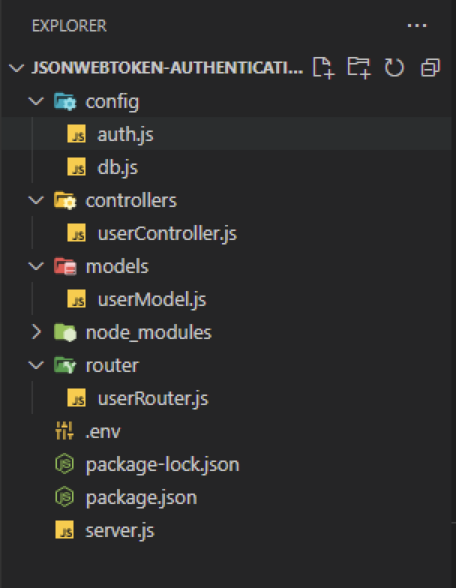
This is the part authentication api with jwt token in node js. If you don’t know that is JSON web token, and how it works, please go back and check out the first part of it. So, Let’s get started. Before that, let’s have a quick review of what we did in the previous part, we have created directories for routes, models, and controllers, and we set up our server. Now we are going to implement our logic. Directory structure till now.
First, go to userRouter.js file inside router directory and put following code in it.
const express = require("express");
const router = express.Router();
const userController = require("../controllers/userController");

router.post("/register", userController.register);
router.post("/login", userController.login);
module.exports = router;
Then go to userModel.js file inside models directory and put following code in it.
const mongoose = require("mongoose");
const userSchema = mongoose.Schema({
  userName: { type: String, required: true, trim: true },
  userEmail: { type: String, required: true, unique: true, trim: true },
  userPassword: { type: String, required: true },
  token: { type: String, default: "" },
});
module.exports = new mongoose.model("User", userSchema);
Here, we are creating a new mongoose schema and exporting a model based on it.
const userModel = require("../models/userModel");
const jsonwebtoken = require("jsonwebtoken");
//function for registering user
const register = async (req, res) => {
  const { userName, userEmail, userPassword } = req.body;
  if (!userName && !userEmail && !userPassword) {
    res.status(400).send("Please provide all details");
  } else {
    //checking if account already exists
    const isExists = await userModel.findOne({ userEmail: userEmail });
    if (isExists) {
      res.status(400).send(`User with email ${userEmail} already exists...`);
    } else {
      //creating user now
      const newUser = await userModel.create({
        userName,
        userEmail,
        userPassword,
      });

      //now creating json web token
      const token = jsonwebtoken.sign(
        { userId: newUser._id, userEmail },
        process.env.JSON_WEB_TOKEN_SECRET,
        {
          expiresIn: "2h",
        }
      );

      //setting it to newUser instance
      const updated = await userModel.findByIdAndUpdate(
        newUser._id,
        { token: token },
        { new: true }
      );

      res.status(200).send(updated);
    }
  }
};

//this function will check user credentials and authenticate user
const login = async (req, res) => {
  const { userEmail, userPassword } = req.body;
  if (!userEmail && !userPassword) {
    res.status(400).send("Please enter email and password");
  } else {
    //lets now first check whether user exists or now
    const user = await userModel.findOne({ userEmail: userEmail });
    if (user && user.userPassword === userPassword) {
      //user logged in

      //now creating json web token
      const token = jsonwebtoken.sign(
        { userId: user._id, userEmail },
        process.env.JSON_WEB_TOKEN_SECRET,
        {
          expiresIn: "2h",
        }
      );

      res.status(200).json(user);
    } else {
      res.status(400).send("Invalid Credentials");
    }
  }
};

//exporting functions
module.exports = {
  register,
  login,
};
This is where we have all the logic for registering and login. We create a new user in mongoDB and after that, a new jwt is created jwt.sign() function. It accepts the userId and email, also, we have the option to set the token’s expiry time. At last, this token is appended to user object stored inside the database.
Our server.js file looks as follows now.
const express = require("express");
const cors = require("cors");
const dotEnv = require("dotenv");
const app = express();
const getConnection = require("./config/db");
const userRouter = require("./router/userRouter");

//registering middlewares
dotEnv.config();
app.use(express.json());
app.use(cors());
//connecting to db
getConnection();

app.use("/users", userRouter);

//listening to server
const port = process.env.PORT || 5000;
app.listen(port, () => {
  console.log(`server is running on port ${port}`);
});
Now we will run server by command npm start.
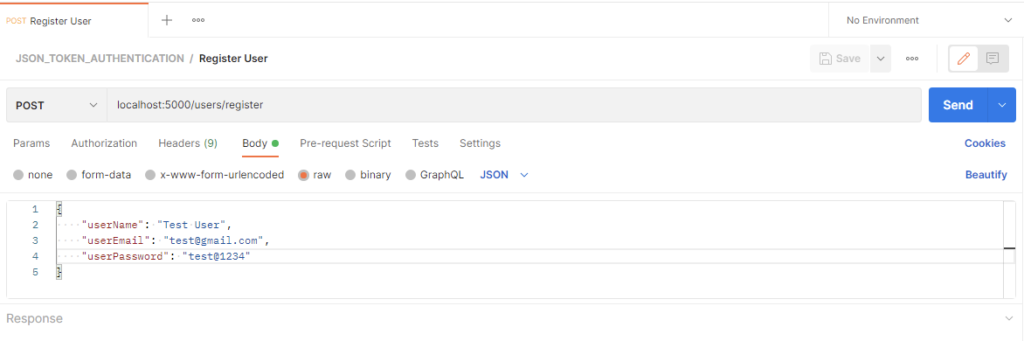
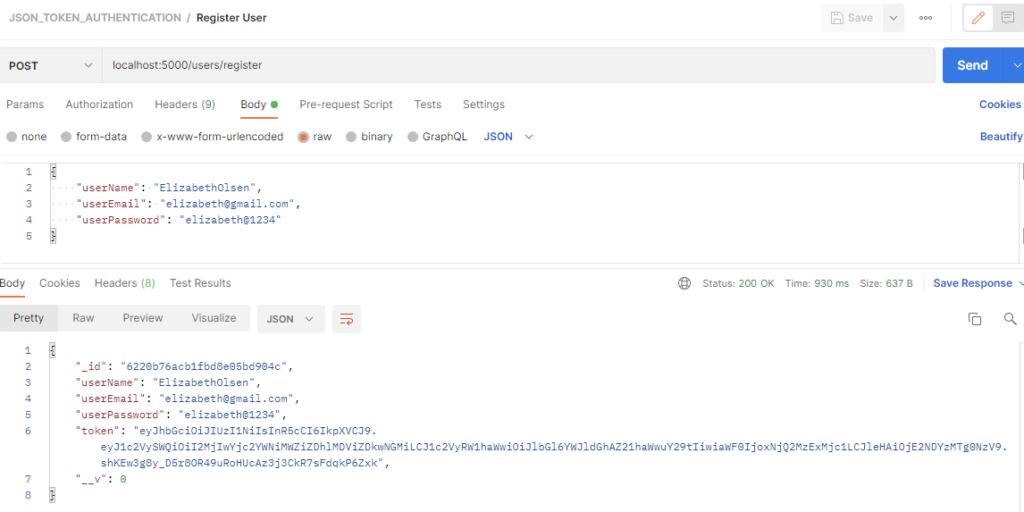
Let us test the API we have created. Open postman and create post request for registering users.
Click on send, and see the response.
Now let’s check login request, again create login post.
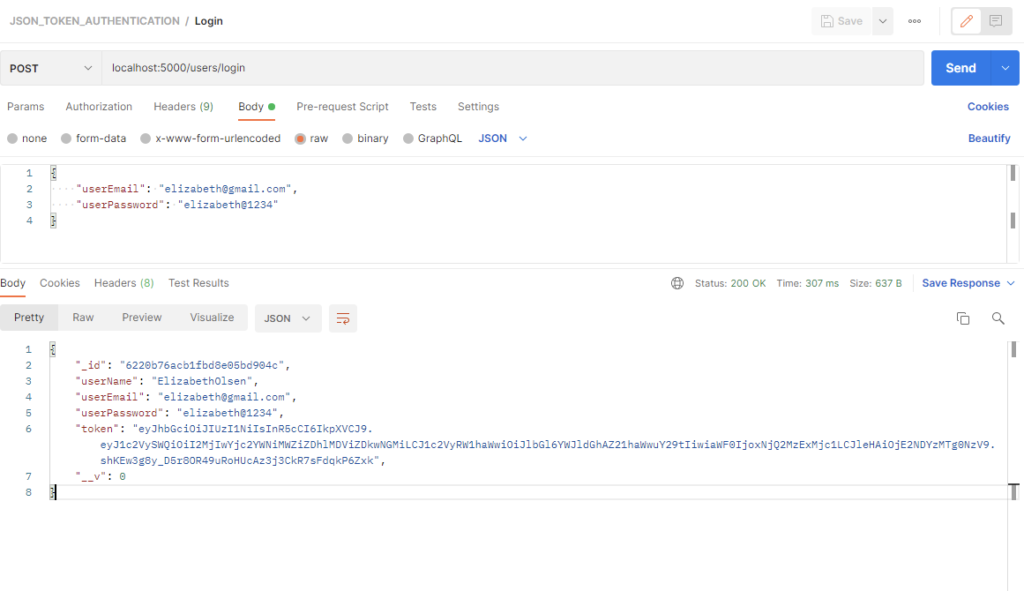
Great, our user API for registering and logging in working fine. Now let’s write middleware for authenticating users via the token.
Put the following code inside auth.js which is under the config directory
const jwt = require("jsonwebtoken");
const userModel = require("../models/userModel");

//we will pass token as body, or in request
//then using this token we will authenticate user, if authenticated we will add user to this request
const authentication = async (req, res, next) => {
  const token = req.body.token || req.query.token;

  if (!token) {
    return res.status(403).send("A token is required for authentication");
  }
  try {
    const decoded = jwt.verify(token, process.env.JSON_WEB_TOKEN_SECRET);
    const _user = await userModel.findOne({ email: decoded.userEmail });
    req.user = _user;
  } catch (err) {
    return res.status(401).send(err.message);
  }
  return next();
};

module.exports = authentication;
Now Let’s test authentication middleware, for this let’s add the following snippet in userController.js
const welcome = async (req, res) => {
  try {
    res.status(200).send(`Welcome ${user.userEmail}`);
  } catch (error) {
    res.status(404).json(error);
  }
};
And don’t forget to add this function welcome in module.exports. Now add following snippet in userRouter.js file.
//lets create route, which will only be accessible if user is authenticated
router.get("/welcome", authentication, userController.welcome);
Let’s test it on postman.
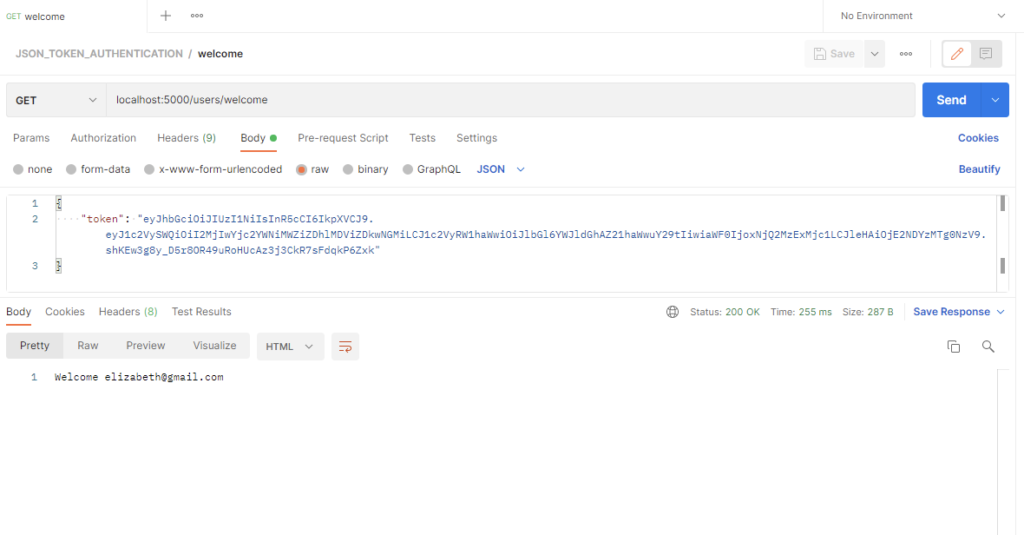
Voila, our user has successfully logged in!
Conclusion
We have implemented authentication api with jwt token in node js. I really hope you enjoyed this tutorial. You can read more about json web token on https://jwt.io/.