Hey folks! In this tutorial, we will be seeing how we can deploy Node JS and Express Rest API on Heroku. One of Heroku’s main advantages is that you can simply add resources to your project in the form of add-ons. Databases, logging and monitoring tools, CI and CD tools, and testing tools are examples of external resources. Let’s have a look at how to add a new resource to your project today.
What is Heroku:
Heroku is a cloud platform as a service CPaaS that supports a variety of programming languages. Heroku, one of the first cloud platforms has been in development since June 2007, when it only supported Ruby. It now supports Java, Node.js, Scala, Clojure, Python, PHP, and Go.
Now we have enough introduction about Heroku, Let’s now push our users API which we have built-in: Building Authentication API with node js and JSON web token.
Prerequisites:
- Node js
- Mongoose
- Git
Setting up repository:
- First, go to following git hub link and clone the repository
https://github.com/m-ali-hasnain/authentication-api-with-jwt.git
- How to clone repository?
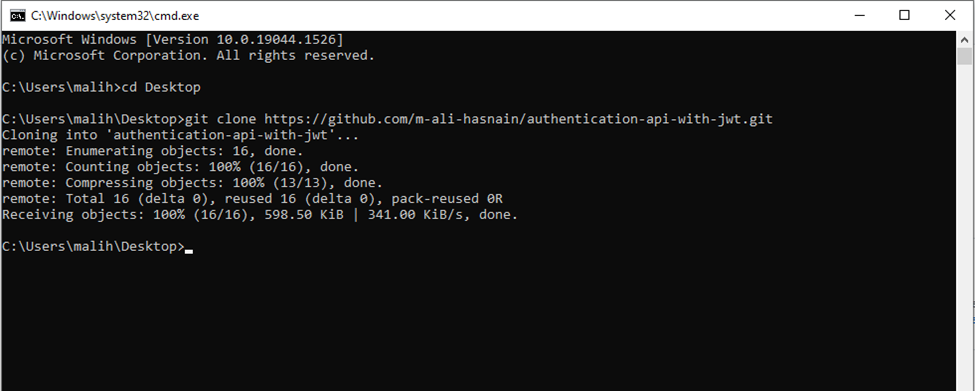
- Now change directory by cd authentication-api-with-jwt
- Type npm I and hit enter
- You can remove pdf files from the directory.
- Your repository is now initialized and ready to run.
- Now go to Heroku website https://heroku.com/ and create an account here.
- If your account already exists, then login.
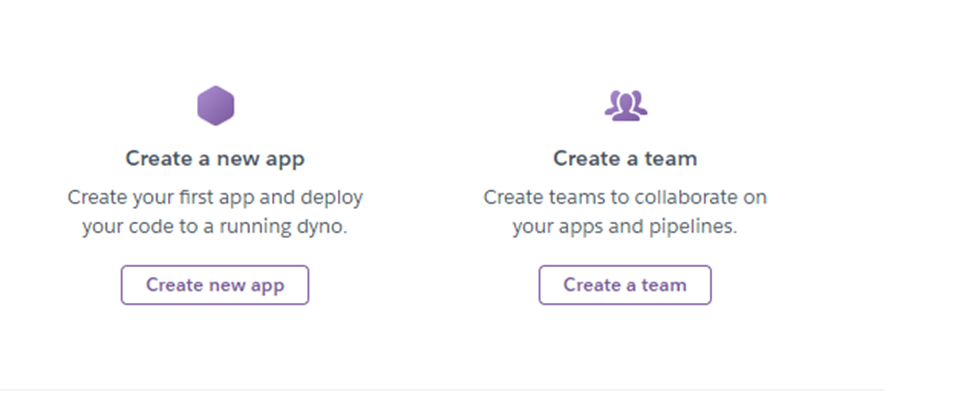
- Click on create app and create new app, give it a name
- You can deploy site using Heroku Git or git hub. I am going to deploy it via Heroku git
- Next you need to install Heroku cli https://devcenter.heroku.com/articles/heroku-cli
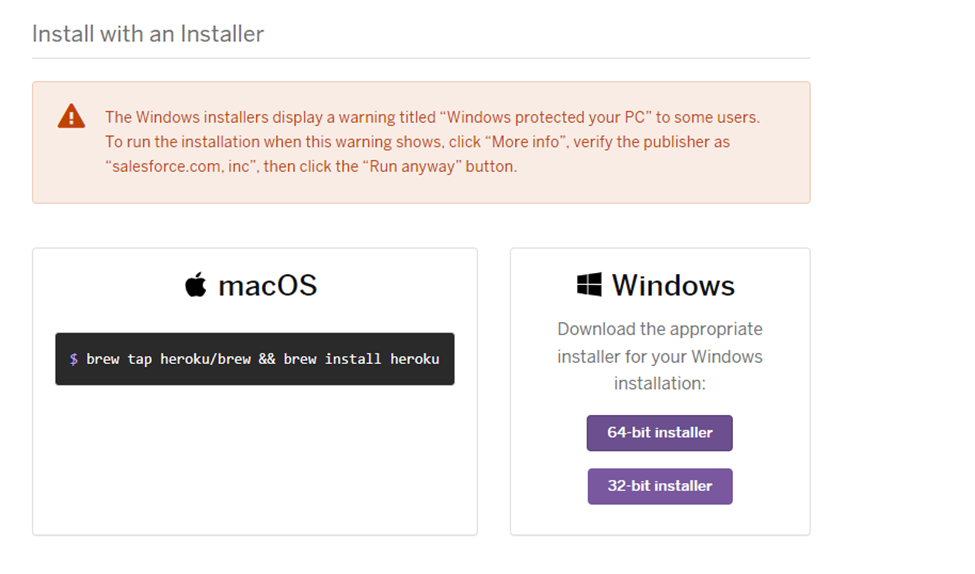
- Choose 64-bit installer or 32-bit depending upon your system architecture
When it downloads and installed, do the following steps:
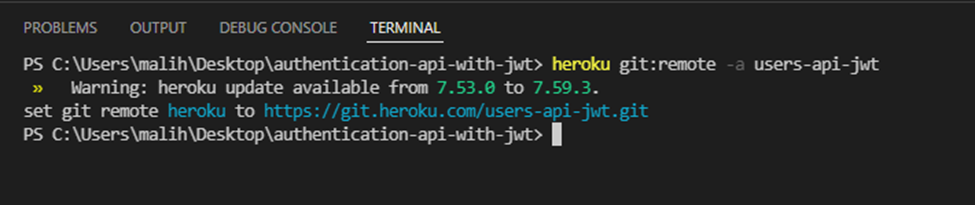
- Open project in editor, go to terminal and type heroku git:remote -a users-api-jwt
- It may ask you to login by pressing any key other than q, press any key and log in via Heroku account.
- Then type git add .
- Then git commit -m “Deploying users api to heroku”
- Now, we need to add env variables in Heroku app, For this go to settings tab of your app in Heroku dashboard.
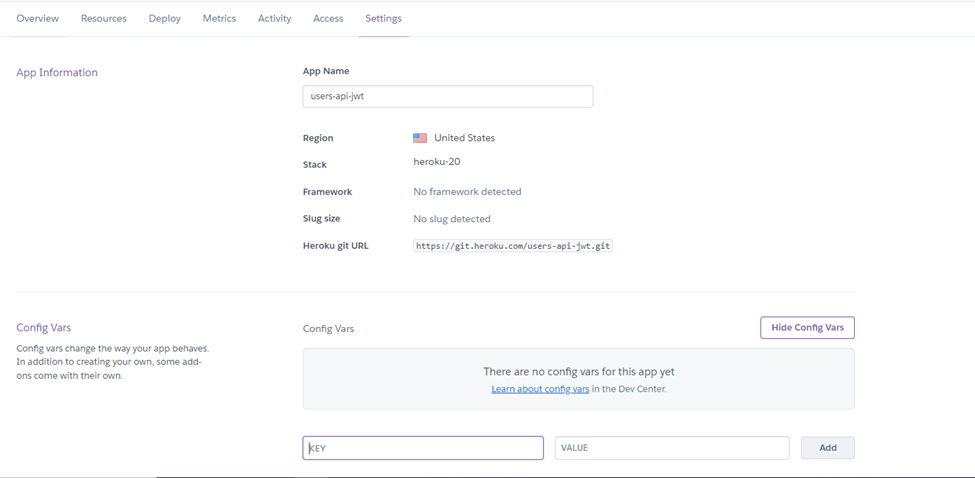
- Add new key, MONGO_URI and put your mongo d burl as value field.
- Add another key, JSON_WEB_TOKEN_SECRET and put your jwt secret key here, In mine case it is “pain is gain” without quotes.
- Finally type git push heroku main in your editor terminal
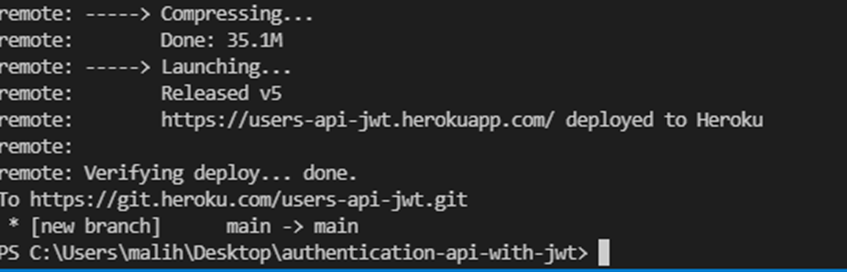
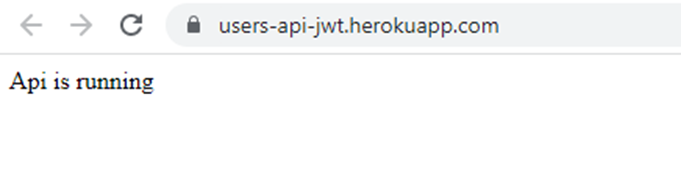
- Finally, click on the open app.

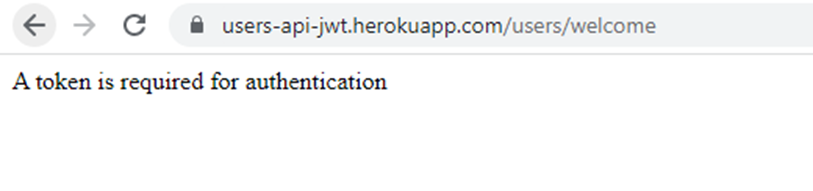
And Boom!!!
Let’s try to access the protected route, /welcome
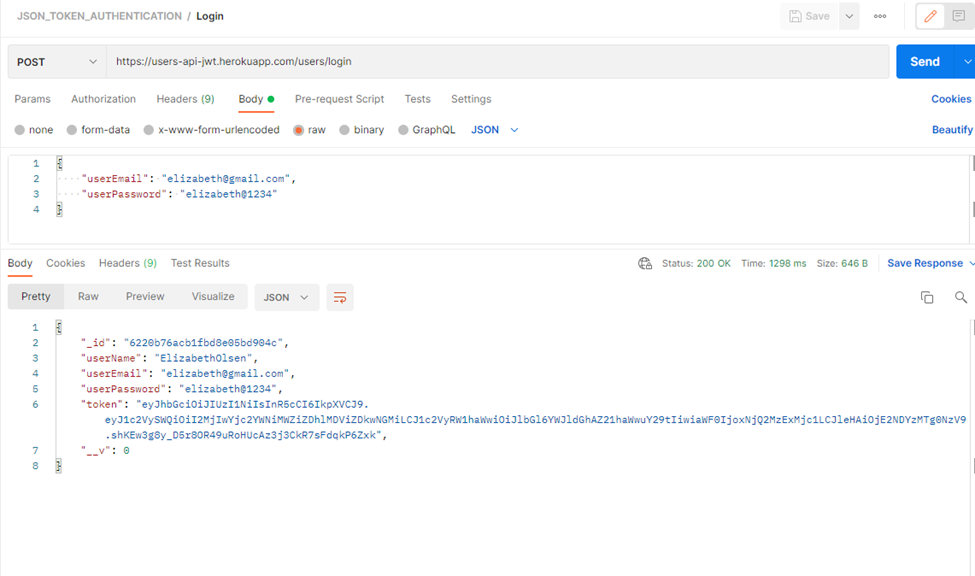
Let’s login via postman, using this new backend URL. Users-api-jwt.herokuapp.com/users/login
Let’s Now attach token from postman to URL as a query parameter and try:
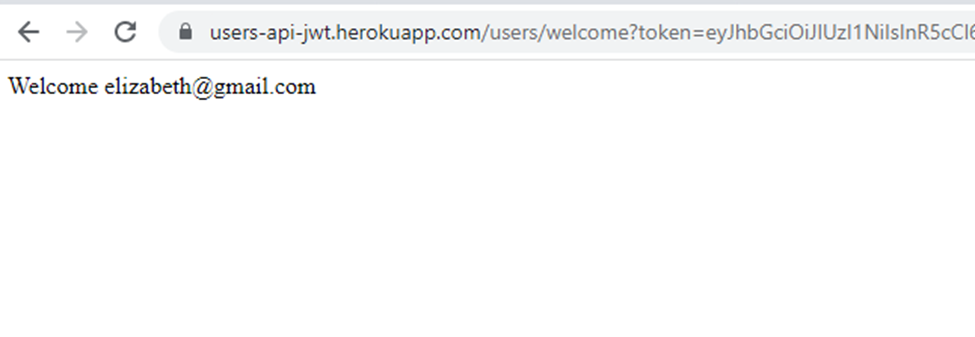
Hurrah!! Our API is now hosted on Heroku. And this is it for today’s tutorial on deploying Node JS and Express Rest API on Heroku. I hope you enjoyed this amazing session and we hope to see you in the next amazing tutorial related to node js and you can visit our website https://nodejstutor.com/ for more amazing tutorials on Node JS 😊