This tutorial is all about connecting a React JS application with Node JS but before jumping right into it let’s just get familiar with ReactJS and NodeJS.
React JS:
React JS is an open-source JavaScript library for creating single-page applications with a focus on user interfaces. It has a strong developer community and is extensively used for creating SPAs (Single Page Applications).
Node JS:
Because of its single-threaded nature, NodeJS is best suited for non-blocking, event-driven servers. It was created with real-time, push-based architectures in mind and is utilized for traditional websites and back-end API applications.
In this tutorial, we will learn about connecting a ReactJS application with NodeJS.Let’s started with any further delay.
Initializing Project:
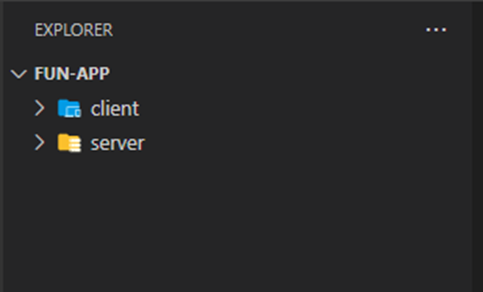
- Create an empty directory, name it as fun-app
- Now create another directory, and name it as client
- Again, create directory name it as server.
- Open it with editor of your choice. I would like to prefer VS CODE
- Open terminal by pressing ctrl+shift+~
- Type cd client and hit enter. Now, you are in client dir
- Type npx create-react-app ./ to create react app with same name as “client”

- When app is created, type npm install axios and hit enter
- Now, go back to root directory by typing cd ../
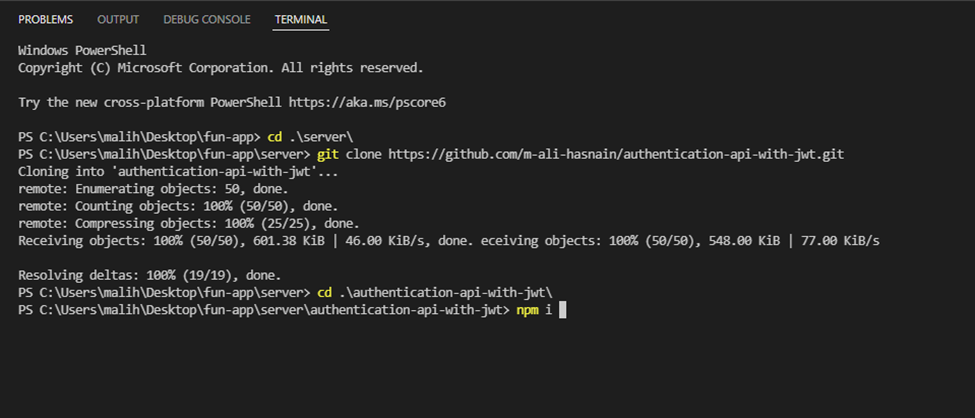
- Now, type cd server
- For server, I am not going to create application from scratch instead I will clone repository from GitHub. This repository is basically users api which performs signup, login and authentication with jwt
- Type git clone https://github.com/m-ali-hasnain/authentication-api-with-jwt.gitand hit enter
- again type cd authentication-api-with-jwt and hit enter
- Now type npm install and hit enter.
- You will need to create .env file under authentication-api-with-jwt directory and put following content in it.
PORT = 5000
MONGO_URI = your mongo db url here
JSON_WEB_TOKEN_SECRET=pain is gain
- Type npm start and hit enter in authentication-api-with-jwt directory. Your server will start.
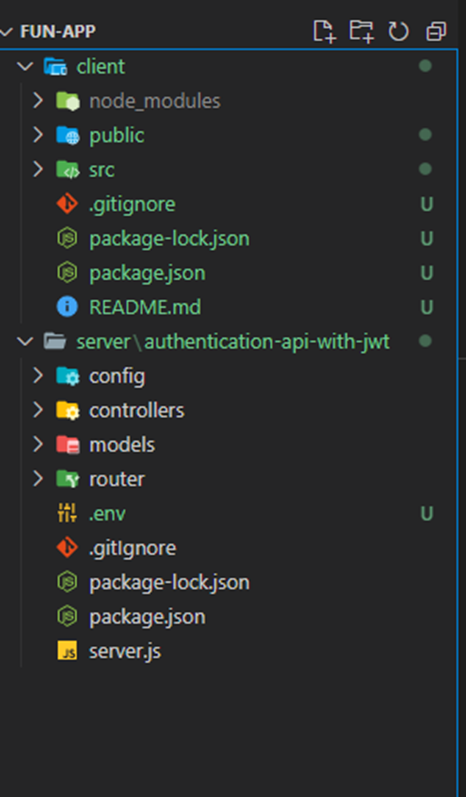
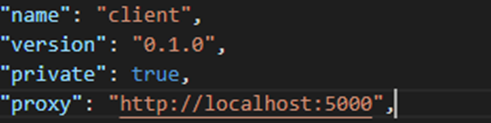
- Now go to package.json file in client and add “proxy” field like this
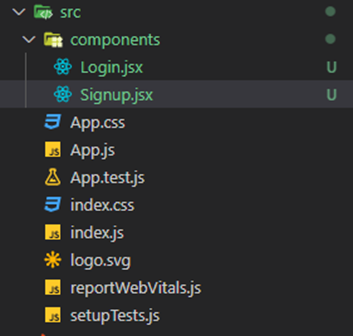
- Go to client folder and then src folder and create a folder component. Then inside components create following files
- Login.jsx
- Signup.jsx
- Welcome.jsx
- Now in signup.jsx put following code
import React from "react";
import axios from "axios";
const Signup = () => {
  const [userName, setUserName] = React.useState("");
  const [userEmail, setUserEmail] = React.useState("");
  const [userPassword, setUserPassword] = React.useState("");

  const register = async (event) => {
    event.preventDefault();

    //now we will send request to backend
    if (!userName && !userEmail && !userPassword) {
      alert("please fill out all details");
    } else {
      var userDetails = {
        userName,
        userEmail,
        userPassword,
      };

      try {
        const { data } = await axios.post("/users/register", userDetails);
        alert(`${data.userName} you are successfully registered`);
        //storing token in localstorage
        localStorage.setItem("token", JSON.stringify(data.token));
      } catch (error) {
        console.log(error);
      }
    }
  };
  return (
    <div>
      <form>
        <label htmlFor="userName">User Name</label>
        <input
          type="text"
          id="userName"
          value={userName}
          onChange={(e) => {
            setUserName(e.target.value);
          }}
        />
        <br />
        <label htmlFor="userEmail">User Email:</label>
        <input
          type="email"
          id="userEmail"
          required
          value={userEmail}
          onChange={(e) => {
            setUserEmail(e.target.value);
          }}
        />
        <br />
        <label htmlFor="userPassword">User Password</label>
        <input
          type="password"
          id="userPassword"
          value={userPassword}
          onChange={(e) => {
            setUserPassword(e.target.value);
          }}
        />
        <br />
        <input type="submit" value="signup" onClick={register} />
      </form>
    </div>
  );
};

export default Signup;
- And in login.jsx put the following code
import React from "react";
import axios from "axios";
import { useNavigate } from "react-router-dom";
const Login = () => {
  const [userEmail, setUserEmail] = React.useState("");
  const [userPassword, setUserPassword] = React.useState("");
  const navigate = useNavigate();

  const login = async (event) => {
    event.preventDefault();

    //now we will send request to backend
    if (!userEmail && !userPassword) {
      alert("Please enter all fields");
    } else {
      try {
        const { data } = await axios.post("/users/login", {
          userEmail: userEmail,
          userPassword: userPassword,
        });

        console.log(data);
        localStorage.clear();
        //storing token in localstorage
        localStorage.setItem("token", JSON.stringify(data.token));
        //redirecting to welcome page
        navigate("/welcome", { state: { userEmail: data.userEmail } });
      } catch (error) {
        console.log(error);
      }
    }
  };
  return (
    <div>
      <form>
        <label htmlFor="userEmail">User Email:</label>
        <input
          type="email"
          id="userEmail"
          required
          value={userEmail}
          onChange={(e) => {
            setUserEmail(e.target.value);
          }}
        />
        <br />
        <label htmlFor="userPassword">User Password</label>
        <input
          type="password"
          id="userPassword"
          value={userPassword}
          onChange={(e) => {
            setUserPassword(e.target.value);
          }}
        />
        <br />
        <input type="submit" value="Login" onClick={login} />
      </form>
    </div>
  );
};

export default Login;
- In Welcome.js put following code
import React from "react";
import { useLocation } from "react-router-dom";
const Welcome = () => {
  const { state } = useLocation();
  const { userEmail } = state;
  return <div>Welcome {userEmail}</div>;
};
- In App.js put following Code:
import logo from "./logo.svg";
import "./App.css";
import React from "react";
import { Routes, Route } from "react-router-dom";
import Login from "./components/Login";
import Signup from "./components/Signup";
import Welcome from "./components/Welcome";

function App() {
  return (
    <div className="App">
      <Routes>
        <Route path="login" exact element={<Login />}></Route>
        <Route path="signup" exact element={<Signup />}></Route>
        <Route path="/welcome" exact element={<Welcome />}></Route>
      </Routes>
      React-App
    </div>
  );
}

export default App;
- Type the following code in Index.js:
import React from "react";
import ReactDOM from "react-dom";
import "./index.css";
import App from "./App";
import reportWebVitals from "./reportWebVitals";
import { BrowserRouter as Router } from "react-router-dom";
ReactDOM.render(
  <React.StrictMode>
    <Router>
      <App />
    </Router>
  </React.StrictMode>,
  document.getElementById("root")
);

// If you want to start measuring performance in your app, pass a function
// to log results (for example: reportWebVitals(console.log))
// or send to an analytics endpoint. Learn more: https://bit.ly/CRA-vitals
reportWebVitals();
So here it is, you have learned about connecting a React application with Node JS, and make sure you practice it a few times to master it. Also, visit our website https://nodejstutor.com/ for more tutorials like these. Happ coding!