Express is the most popular Javascript framework which provides a robust set of features that can be used for building multipage, single page, and hybrid applications. If we explain it in simple terms it provides the right infrastructure that can execute our code easily inside a web server. This tutorial is a basic introduction to express in NodeJS. Let’s jump into details and find out how can you use Express in your node application.
Step 1:
The first step is that you have already installed and set up nodeJS in your local system. When done you will create a folder and create an index.js file. After this, you will run two commands
- npm init
- Npm install
Once done you will have the following files in your folder.

Now the setup of Node is complete which was required for this tutorial. Let’s jump to the next step.
Step 2:
In the second step, you will type the following command in the terminal or the command line and hit enter.
npm install express --save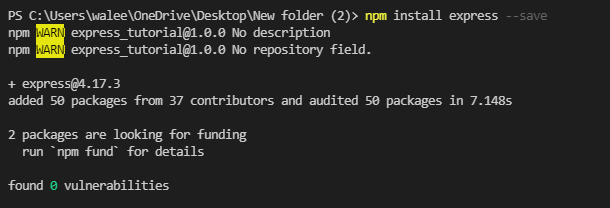
You will get a similar output as shown above. This will install the Express framework in your application and also a new dependency will be added in the package.json file.
Step 3:
In the next step, we will be creating a file to handle all the express related functionalities in the application. You can name this file whatever you want. I will be naming mine server.js.
const express = require("express");
var app = express();
app.get("/", (req, res) => {
    res.send("Hello World");
});
app.get("/books", (req, res) => {
    res.send({
        message: "Hello Books"
    });
})
app.listen(3000, () => {
    console.log("The web server is up and running!");
});
Let’s have a look at the code above in detail
const express = require("express"); In this piece of code, a reference is added to the Express framework and is stored in a constant known as express.
var app = express();This fires up an instance of the Express server.
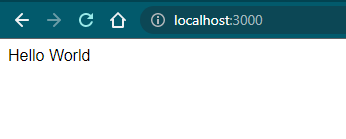
app.get("/", (req, res) => {
    res.send("Hello World");
});
Step 4:
This is the point where the main thing starts. We will be defining an Express route that defines what response it will send once it receives a request with a particular URL. Url path takes up the first argument and the second one is a function. This function contains both the response and request parameters for working with a particular request. The response will be shown in the form of a string that reads as “hello world” in this particular scenario if the user browses to the root path of the application.
But it is never about strings in response. JSON object wrapped in response can be obtained by you and can be displayed on the browser. This is done by the code given below.
app.get("/books", (req, res) => {
    res.send({
        message: "Hello Books"
    });
})
app.listen(3000, () => {
    console.log("The web server is up and running!");
});
This code starts the server on the mentioned port number. The first argument is the port number which is 3000 in this case. Port number caters the incoming requests. The second argument of the listen-to method is a callback function that notifies the user when the server starts.
Run the server.js once you have typed the code and you will see the following output


Step 5:
Now we will serve a static HTML file that is in the application path. Inside a “public” folder create a new HTML file and name it anything you like. Paste the following code in that HTML file.
<html>

<head>
    <title>The Hello HTML File</title>
</head>

<body>
    <p>This is the body of the HTML file</p>
</body>

</html>
To render this static file, it is important to let Express know how to handle requests for static files.
app.use(express.static(__dirname + "/public"));Type this code to handle requests for static files. This code will look for the HTML file and then serve it to the browser. Use method is an Express middleware function. The reserved keyword that denotes the application root path is the “__dirname”
Paste the code given above into the server.js file and restart the server.

And there we have our HTML file.
This was just an introduction to express and we hope you enjoyed this tutorial of introduction to express. For more tutorials like these, you can visit our home page at https://nodejstutor.com/ and for a better understanding of Express, you can visit https://expressjs.com/ and go through the documentation. See you in the next one.